How to setup Google ReCaptcha
You will need to sign up for Google Recaptcha — https://www.google.com/recaptcha/.
Step 1
You can choose either ReCaptcha V2 or ReCaptcha V3.
Add the necessary domains your site will be accessed by into the fields provided.
Step 2
Take note (or keep the browser tab open) of both the Site Key and the Secret Key. You will need these for the next step.
Step 3
Login to the CMS.
Step 4
In the tree menu, go to 'Global'.
Step 5
From the grid, select 'Settings'.
Step 6
Go to the Form tab > Choose the relevant ReCaptcha version (V2 or V3) > Paste your Site Key and Secret Key into the respective fields provided.
Step 7
All forms that come with uSkinned Site Builder will now run successfully with Google ReCaptcha spam protection. Please note that if you are using Umbraco Forms you will also need to add the relevant ReCaptcha filed to your form.
Add to Umbraco Forms
Step 1
In the top navigation, go to Forms.
Step 2
On the left side, expand the Forms folder and navigate to any of your Umbraco Forms — or build a new one.
Step 3
Add a question.
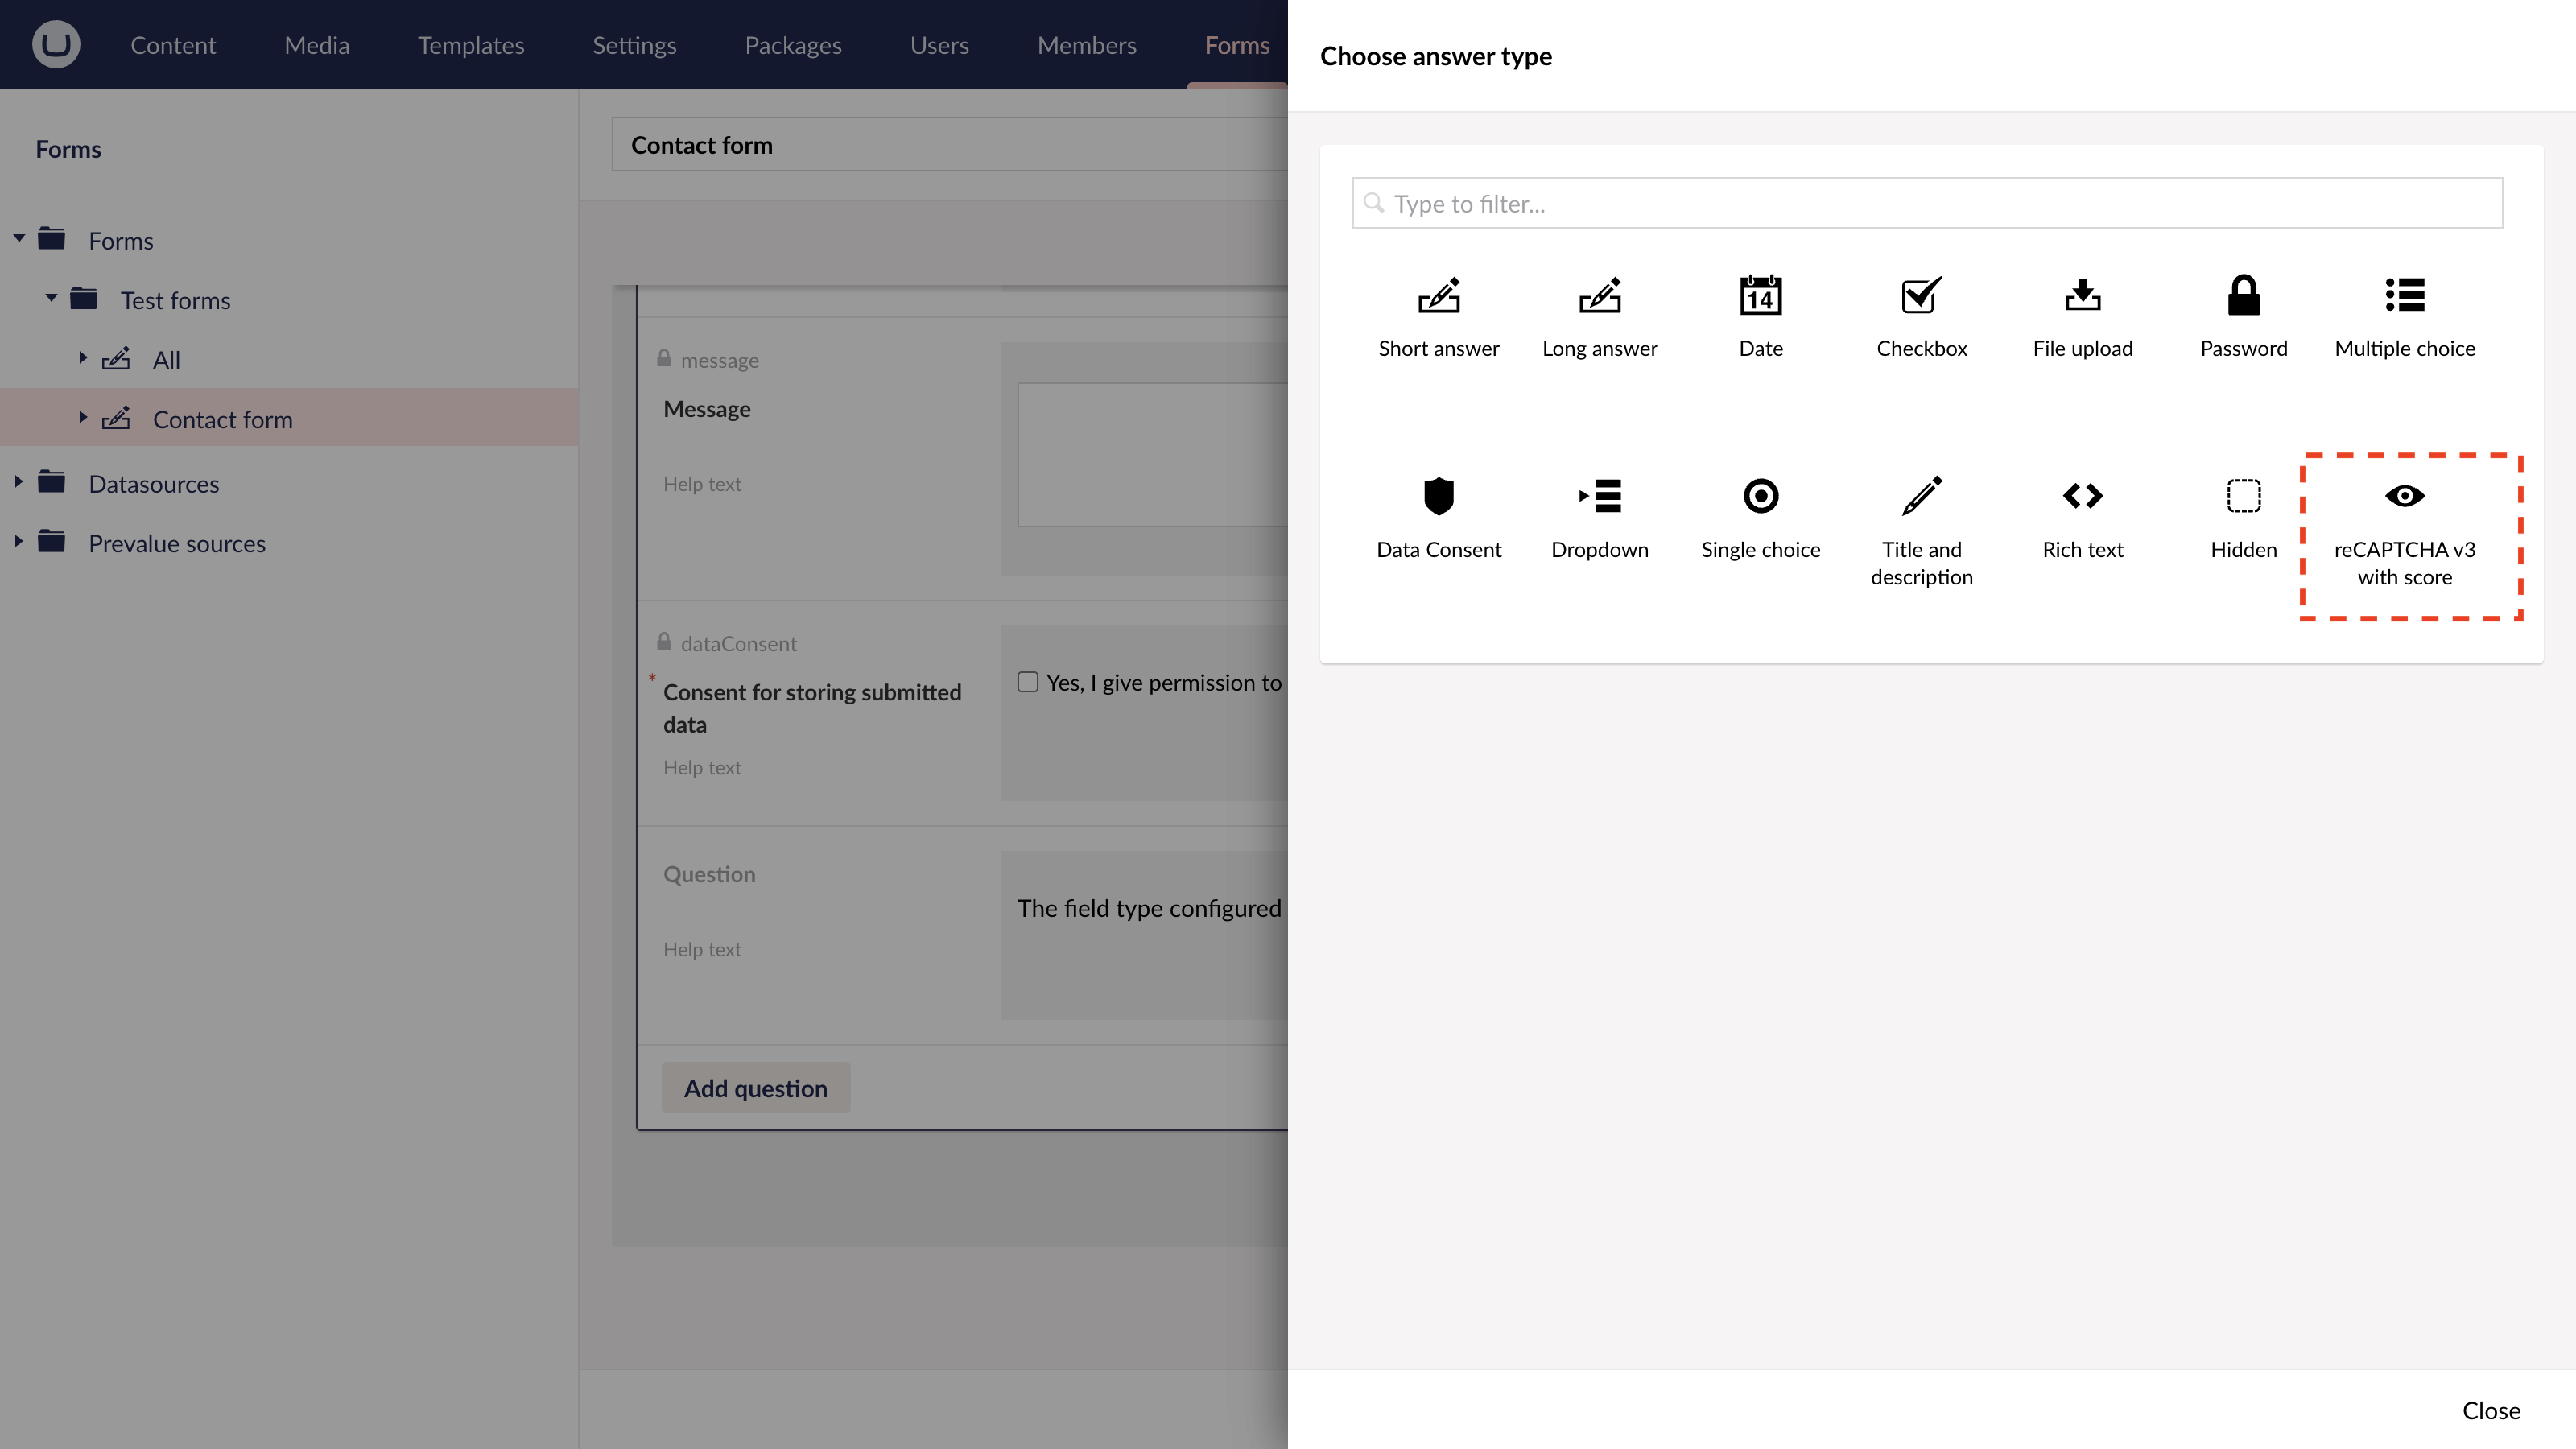
Step 4
In the slide-out panel, click 'Choose answer type'.

Step 5
In the slide-out panel, choose either Google ReCaptcha v2 or Google ReCaptcha v3.
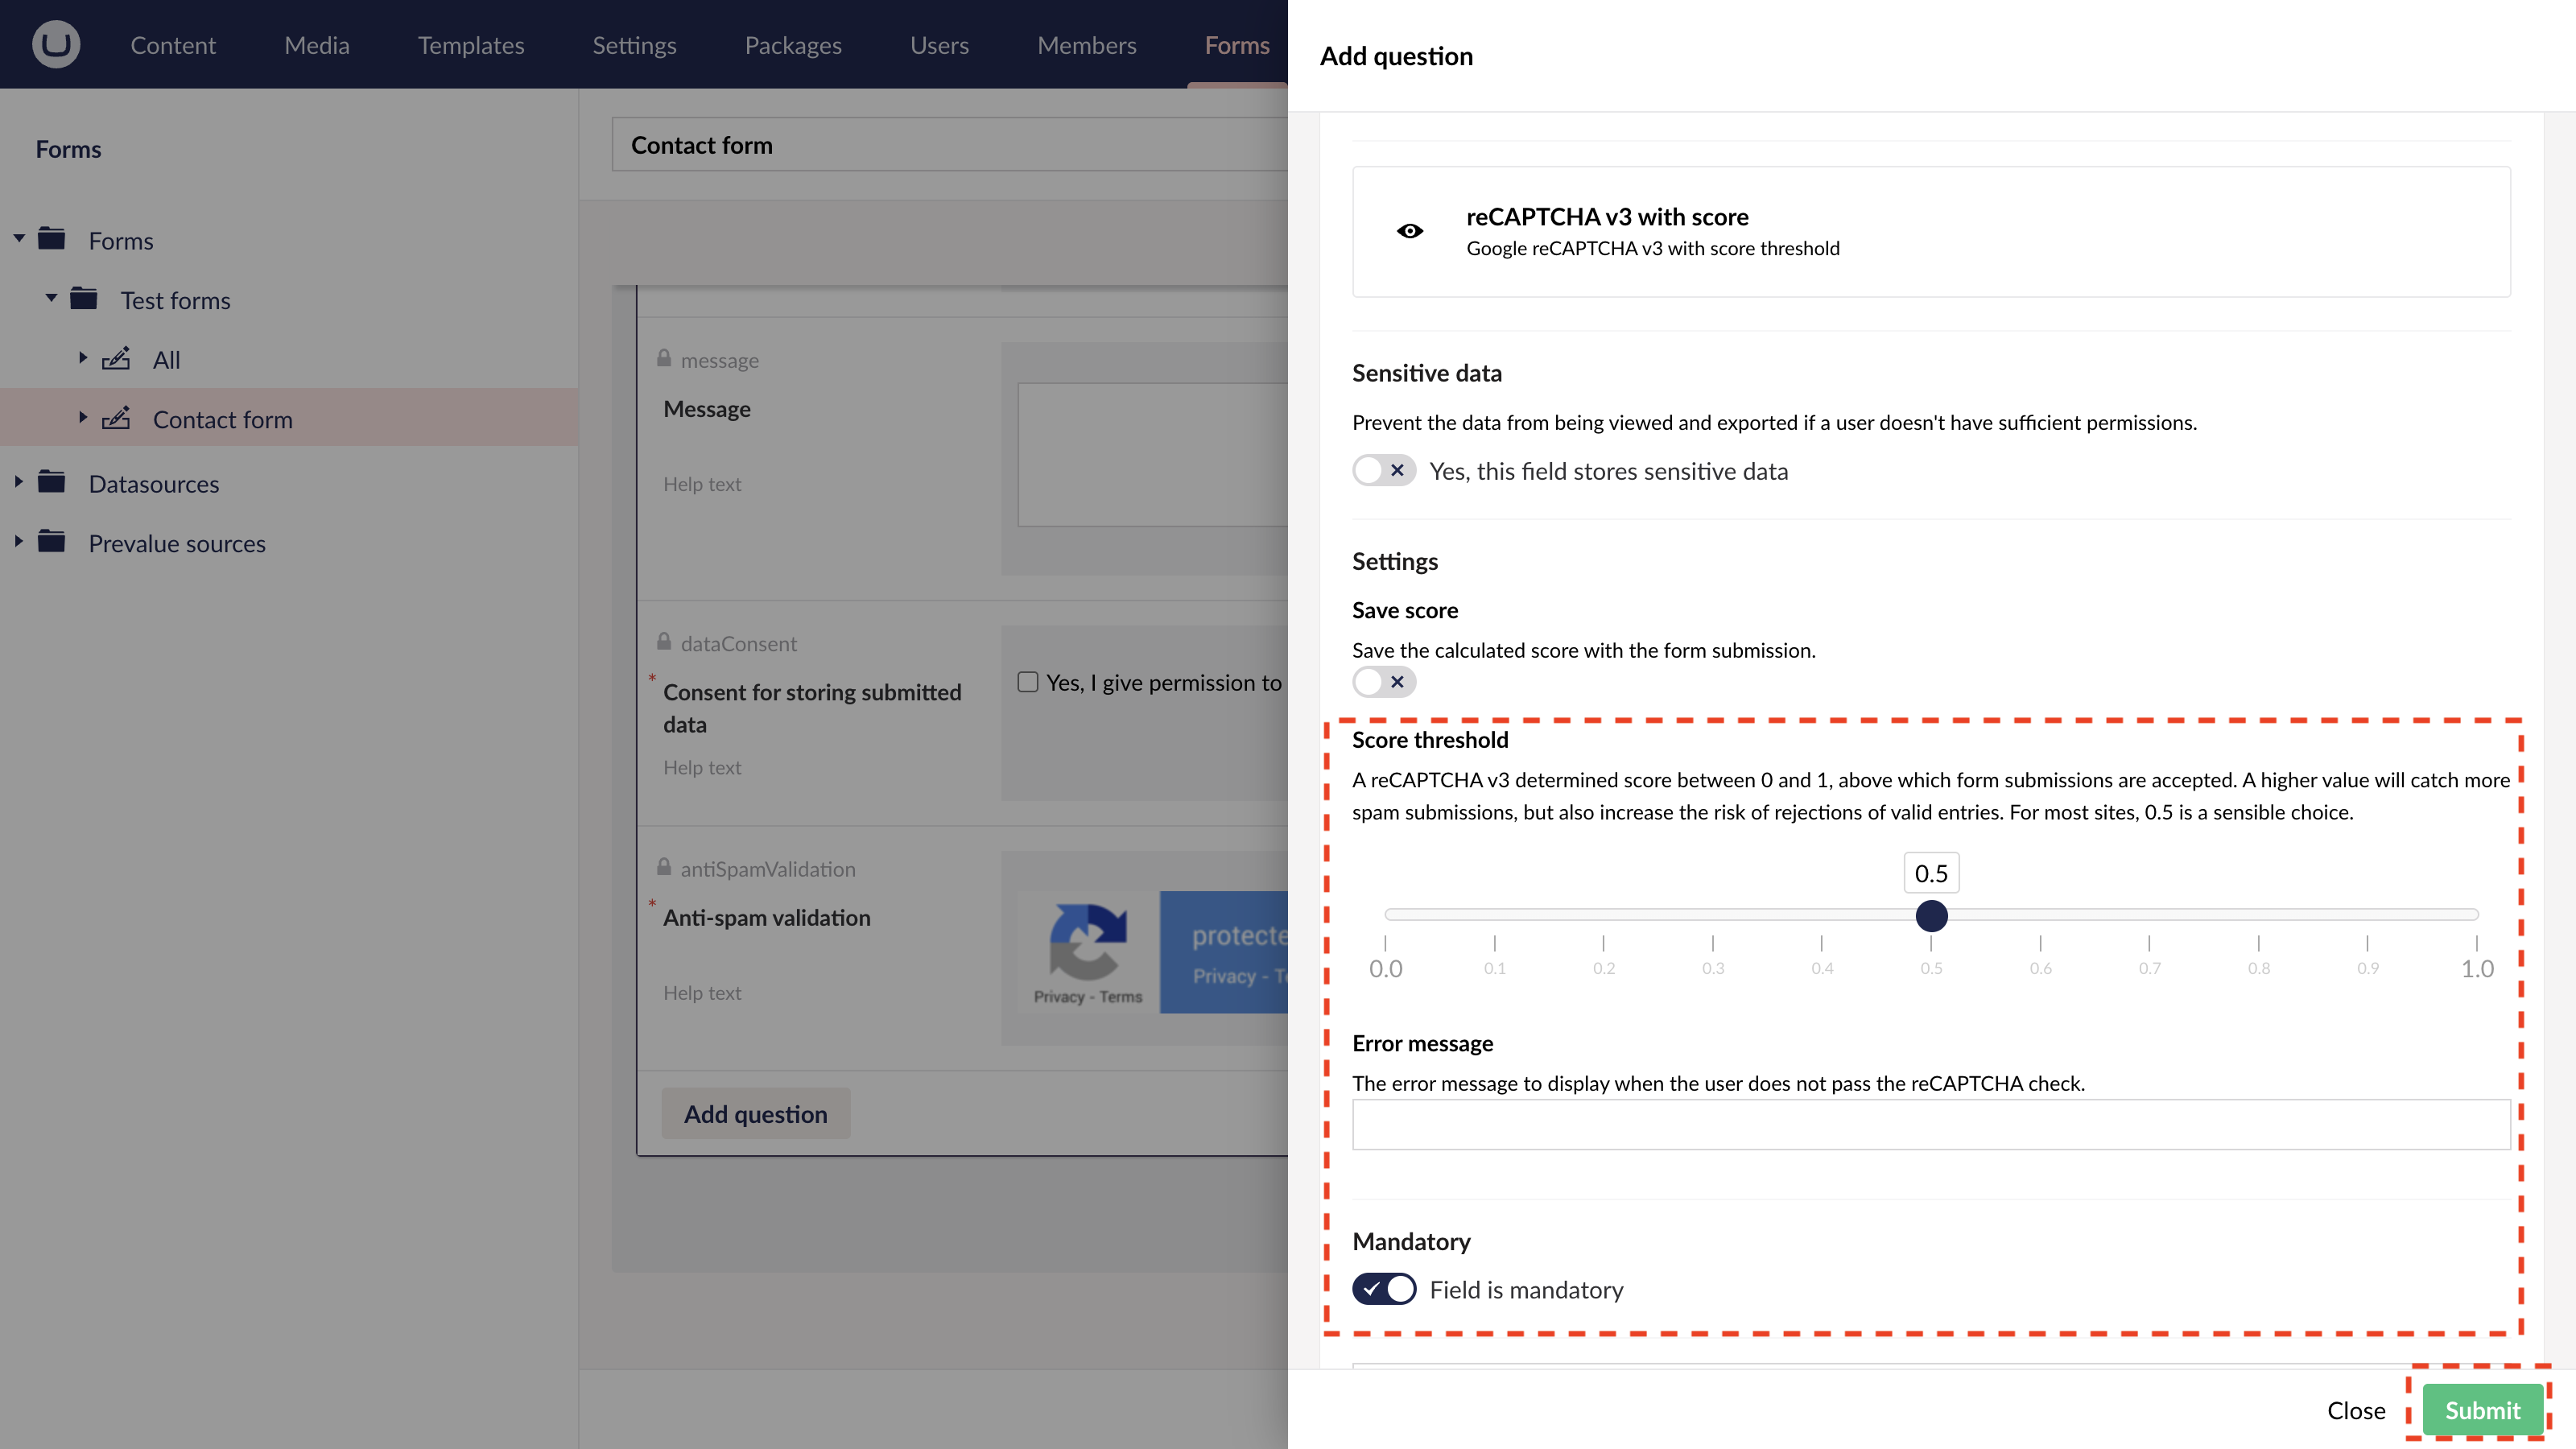
Step 6
Enter a label title and then scroll to set it as a mandatory field. Adjust the other settings as required.
Please note that the label title will only display on Google ReCaptcha v2.
Google ReCaptcha v3 is invisible.
Step 7
Hit submit.
Step 8
Click 'Save'.
Your Google ReCaptcha will now be active on this form. Repeat for any other Umbraco Forms you create.
#h5yr
Step 3
Create
Create content with the Visual Editor and utilise built-in eCommerce and integrations.
Step 4
Go Live
You can host securely on Azure with uSkinned Hosted, or go your own way with a Self-Hosted license.
